Silk Wrap Bracelets – DIY Ribbon Wrap Bracelets
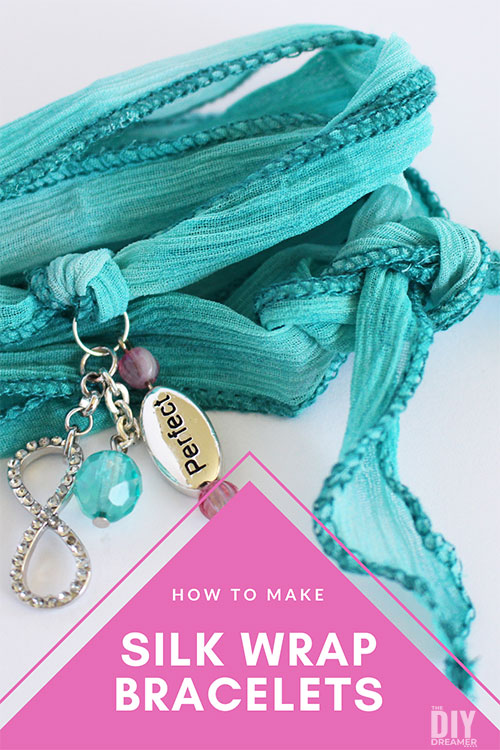
Learn how to make simple and beautiful silk wrap bracelets. These DIY silk wrap bracelets make great personalized gifts.

A few weeks ago I mentioned to you that Gabrielle had been working on a fabulous school project that I couldn’t wait to share with you.
I’m so excited to share it with you today or I should say I’m very excited that Gabrielle will be sharing it with you today!
She worked really hard on her project and her hard work paid off.
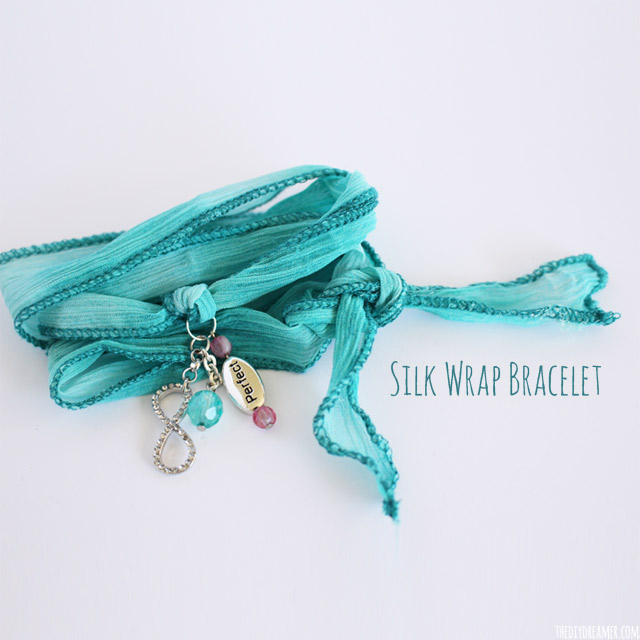
Silk Wrap Bracelets
Hello I’m Gabrielle! I’m Christine’s daughter. I just turned 9 on Monday!
I’m very happy to be here today to share with you my Silk Wrap Bracelet Tutorial, which was my end of year school project.
My teacher and my friends really enjoyed my project, I’m hoping that you will too.
Here’s a collage of what my project looked like:

What do you think of my setup?
It was very fun to put together. I even showed my friends my Mom’s blog so that they can see other tutorials I have shared on her blog like my Chunky Bead Bracelets. I bet you’re excited to see the tutorial in detail, so here we go!
This post also contains some affiliate links for your convenience. Click here to read my full disclosure policy.
How to make Silk Wrap Bracelets
Tools:
– Flat nose pliers
– Round nose pliers
– Wire cutters

Supplies:
- Silk ribbon
- More great selection of silk ribbon.
- Jump rings
- Beads
- Charms
- Pin needle findings

Instructions:
Step 1: Thread a jump ring onto the silk ribbon.

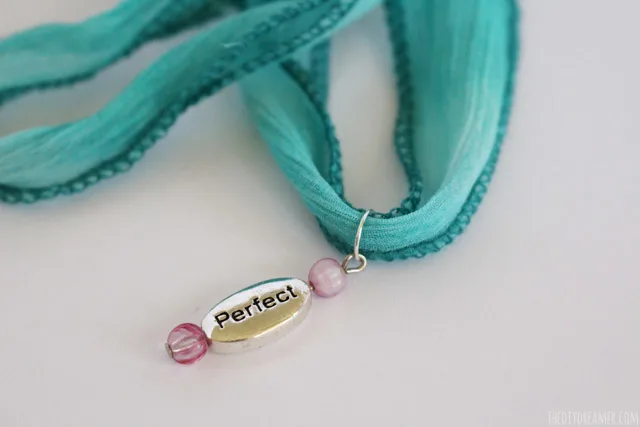
Step 2: Take out a pin needle finding and insert a bead on it.

Step 3: Use the flat nose pliers to bend the pin needle finding to a 90 degree angle.

Step 4: Use wire cutters to cut off some of the length from the pin needle finding. (If it’s too long your loop will be too big.)

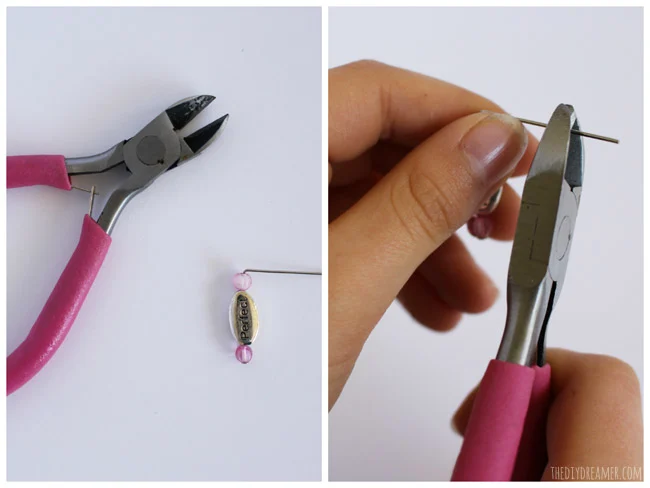
Step 5: Take out the round nose pliers and use them to roll the pin needle finding into a loop. (Do not close it completely yet!).

Step 6: Place the loop onto the jump ring on your silk ribbon.

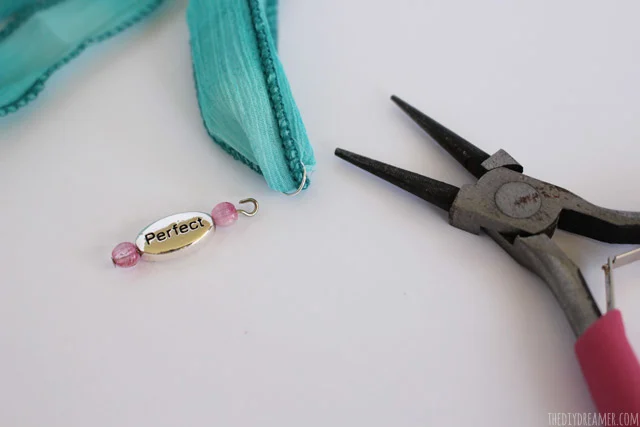
Step 7: Now you can close the loop using round nose pliers. (The bead is now secure onto your bracelet.

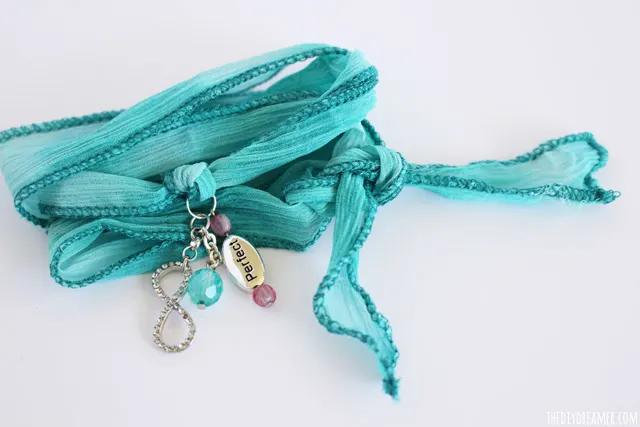
Step 8 (optional): If you have charms that you would like to put on your bracelet: you can use flat nose pliers to open their jump rings and attach them onto the bracelet.
Don’t forget to close the jump rings to secure them onto the bracelet.
P.S. You can make your own charms using earrings too!
Also some charms come with lobster attachments, which means you can just open them and attach them immediately onto your bracelet!

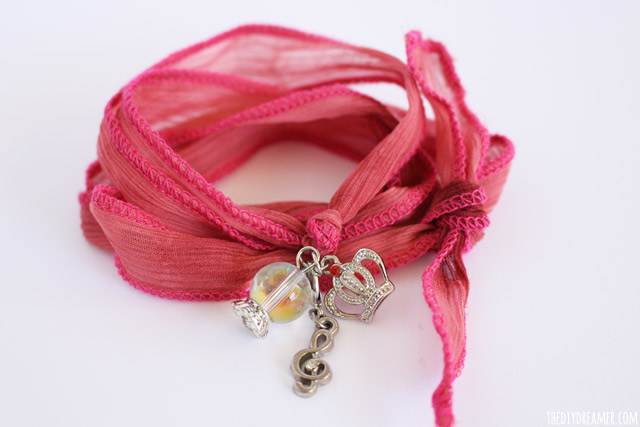
Step 9: Place the jump ring with all the charms in the middle of your ribbon and tie a knot to secure it in place.

Step 10: Wrap the bracelet around your wrist and make a knot!


I hope you enjoyed my project!
If you have any questions, please ask them.. it will be my pleasure to try to answer them for you.
Thanks for reading! Gabrielle
*****
And??? What do you think of Gabrielle’s Silk Wrap Bracelets?
Aren’t they AWESOME?
I think they turned out so cute! I’ve put in an order with her for a couple of them. hehe
Have a great day!!

Super cute!! :)
Good job Gabrielle! You are very talented!
Gorgeous bracelets!You are great Gabrielle!!!
Hope you have a wonderful weekend!
Hugs from Portugal,
Ana Love Craft
http://www.lovecraft2012.blogspot.com
Thats awesome! My daughter, Gabriella, who is 8 is also into beading. Gotta love it when a little girl takes after her craft momma. Close to my heart.
Gabrielle this is adorable!!!!I love it.
Thanks for sharing:):)
Super job on the tutorial, Gabrielle! You have a great way of explaining things! The bracelets are very cute!
These are adorable! Great job, and hello from Idaho :)
Those are super gorgeous! I love them!
This is amazing, and so lovely! I cant wait to try it!
So cute! Wonderful tutorial Gabrielle:)
I absolutely love these and know that my seven year old would too! Pinning for sure!
They are really pretty! I love the colours and charms you chose, they look great together. I would love to see if you do any other projects!
It’s sooooooo very lovely pattern . thanks a lot (“:”)
Super cute project Gabrielle! Love it! I’ll have to try and see if I can follow along!
Great tutorial Gabrielle! I’d like to make some of these with my niece! Can you tell me where you found the single-color silk ribbon?? Like the turquoise. I’m having a hard time finding them less than $5 each – and they’re multi-colored! Thanks!
Oh my gosh those are adorable! I want one!
Those are just darling! The colors are so lovely and I am crushing on the wee charms. So perfect. What a pretty, pretty jewelry idea.
These are so cute!! I’m going to make some for my daughter and I. Heading to the craft store for supplies!
Very pretty–thanks for the tutorial!
Beautiful! I hope my daughter ends up sharing my passion for jewelry-making someday!
Gabrielle is a talented jewelry maker! You must be proud! Love the bracelets!!
Thanks for sharing Gabrielle!
These are so beautiful Gabrielle, I’m pinning this on my jewellery making ideas pin board now. Thank you for the lovely idea.
Your daughter did an excellent job on this tutorial!
These are so fun! =) It was great meeting you at Haven, Christine…I will look forward to following along… xoxoxoxo
Wow! These are gorgeous! What a wonderful idea and I love how you can personalize them if you make one as a gift. Thanks for sharing!
Fabulous Gabrielle! I love that tutorial. Most jewelry tutorials I see look too complicated for me to try, but I think I might be able to do this one. The silk ribbon makes the bracelet so very elegant! I saw this post over at Savvy Southern Style blog party.
Love these! Great project!
Sherry
They are so sweet. Great job!
Love these!! Do you have an on-line source for the ribbon and charms? I’m very rural, with no craft store near. Thank you!
What a great job your daughter did. I fell in love with this post.
Thank you so much for sharing your creativity on The Inspiration Board at homework. I loved your project and featured you today!
Have a wonderful weekend!
carolyn ~ homework
Thanks for linking to Create Link Inspire at The Crafty Blog Stalker. You have been featured and pinned! Thank you for sharing.
–Katie, TheCraftyBlogStalker.com
Great job Gabrielle! These bracelets are beautiful! I have one question: where can I find silk ribbons? I live in Italy and haven’t seen them around here. Thank you!
Wow!!great job Gabrielle :) love the wrap bracelets :)
I’ve always loved these, but would never have attempted to make one myself. Thanks so much for linkin up on Sunday FUNday! I’ll be featuring you at this weekend’s party! XO
so pretty! I love that your daughter did this! Featuring today in the Create Link Inspire features on Nap-Time Creations… spreading the word on social media.. thanks for linking! Emily
Wow! What lovely bracelets, Gabrielle! I must confess that I am many years older than you, and I’ve been afraid to make any jewelry that involves using wire and pliers.: ( But your excellent tutorial has given me just the motivation I need to try it for the first time!
Thank you! xoxo
Christine, I LOVE this! Pinned it so everyone can see this great tutorial from your daughter! Thanks for sharing at the Project Stash!
These are stunning! About how much ribbon do you need?
Love the tutorial. We’re dis u get the ribbon?thank u
Where can I purchase the ribbons?
Where is the best place to find the silk ribbon? Having trouble…
I got mine at Michaels, however I’ve seen a huge selection on Etsy. :)
Super cute and awesome. Going to makea few for myself and my sisters.
Was wondering what is the length of the ribbon, I did not see.
Thank you
Wow! Thanks Gabrielle, for sharing this! I know my daughter would love this too! I am pinning it so she can make one for herself. I am visiting from Creative Inspirations today.
Super cute!
My daugters name i Gabrielle also Bt, mine is 17 (almot 18)Thes braceletsare so lovely and simple I wan to run and make several right NOW! THIS is what you call “Simple Elegance”!
Hi, I love these bracelets. Where do you buy your silk wrap?
Hi!! You can get them on Amazon, the link is in the supplies above. They are also have them at Michaels.
These are so cute! I really like the teal one. Thank you for sharing the tutorial Gabrielle! I’m visiting today from the Friendship Friday link up. Have a great weekend Gabrielle and Christine!
These are so cute and pretty! In love the colours, especially the teal one. Thanks for sharing at the #HomeMattersParty.
Hope to see you there next week as well :)
These are wonderful Gabrielle, We love to see old projects as well as mew ones at Handmade Monday so they will be one of the features this week :-)