Basement Renovation: DRIcore Subfloor Installation
I’m so excited about today! I get to share with you the DRIcore Subfloor installation in our future office/craft room in the basement! I’m so happy with how it turned out. It’s looking more and more like a room. LOVE IT!
It all started when this arrived in the fall:

You have no idea how excited I was when it arrived! It meant that I was going to finally have a real office/craft room! YAY! A big THANK YOU to Sébastien and my Dad from bringing it all in the basement. I wasn’t able to help, since I still wasn’t allowed to lift anything because of my surgery.
When it arrived we started the planning process right away. We had a few things we needed to do to ready the space, empty it (we had SO MUCH stuff in there), clean, waterproof, change windows, etc… You can read all about it here: Basement Waterproofing, Changing Windows, and more. Once that was all done, the fun part started!
DRIcore Subfloor Installation
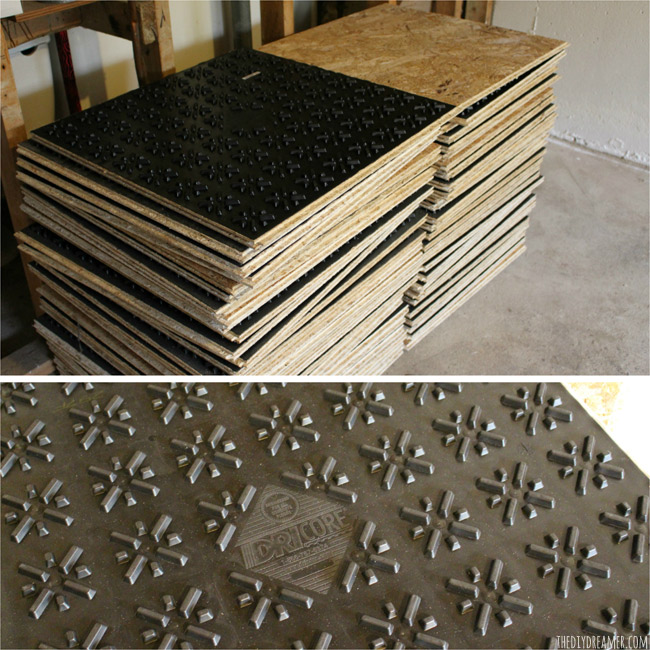
DRIcore Subfloor is an easy-to-install subfloor system designed for basements. The panels are equipped with air gap technology to protect, insulate, and cushion finished floors. They have OSB top and polyethylene bottom. It also has an R-value of 1.7 and can increase the temperature of a finished floor to 3.2°C (6˚F). DRIcore Subfloor allows concrete to breathe, which reduces the potential for mold and mildew. Each panel is 2 foot x 2 foot and weighs 7.5lbs. Want more info? Read all about it here: DRIcore Subfloor.
Before we actually started installing it, we watched this very detailed video.
We found the video super useful. I’m very visual, so I really appreciated being able to watch how to install the DRIcore Subfloor. We also watched a second video, that demonstrated how to install DRIcore Subfloor and SMARTWALL, very much worth watching too.
Supplies and Tools needed for installation
– DRIcore Subfloor (Use the Project Calculator to determine how many panels you need.)
– 1/4″ spacers
– Pencil
– Wood tapping block
– Rubber mallet or hammer
– Level
– DRIcore Leveling Shims
– Large carpenter’s square
– Pull bar
– Circular, jig or hand saw
– Tape measure
Instructions:
Detailed Instructions by DRIcore
Step 1: Time to start! YAY! We started off by making sure the floor was nice and clean (free of all debris). We also went through with a level to make sure it was fairly level. If ever your floor isn’t level, make sure to check out the videos for tips on how to fix it.
Step 2: We placed temporary 1/4” spacers around the perimeter of the walls. As you can see we used shims as spacers.

Step 3: We measured our first row prior to installation. It’s important to make sure that the last piece in the row is at least 3″ wide.

Step 4: Time to start placing the DRIcore Subfloor panels! The first panel must be placed in a corner with tongue sides against the temporary 1/4″ spacers.

Step 5: Time for the second piece! The panels are designed with an interlock tongue and groove system, which means they lock into each other. To lock the panels together, align the tongue of the panel with the groove of the previous panel. Once aligned, use a tapping block and rubber mallet (we used a hammer) to lock them together by placing the tapping block against the panel and hammer it with the rubber mallet. Make sure the seams between the panels are tight. We kept repeating this step with the next panels, until we reached the last panel of that row.

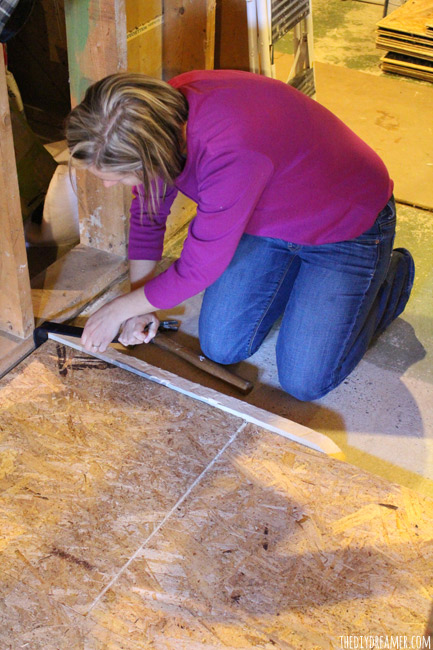
Step 6: Once we reached the last panel of that row, we measured to see what size panel we would need. Don’t forget that we measured prior to make sure it would be at least 3” wide. We toke out the Subfloor panel we planned to use and used a pencil & large carpenter square to mark the cut line on the panel. We used a circular saw to cut the panel however we could have used a jigsaw or hand saw. Important: Make sure you cut the panels in the right direction. We accidentally cut our first piece horizontally instead of vertically. Once the panel is cut, we used a pull bar and hammer to wiggle it into place. (You’ll see a great demonstration of this in the videos I shared at the beginning of the post.)

Step 7: As we went along, we made sure to frequently check to make sure the Subfloor was level. We used the DRIcore leveling shims for any floor variations less than 1/4″. One of the great things about the DRIcore leveling shims, is that they can be stacked. Very useful!


Step 8: Time to start the second row. The first panel of the second row must be at least 6″ wide. Before cutting the tongue side of the first panel we made sure we were cutting it in the correct direction (remember that the other tongue side must lock into the panel in the above row). Once that panel was locked into place, we continued the row by adding more panels. By starting the row with a panel that’s 6″ wide, it staggered the Subfloor panels like brick wall pattern.
Step 9: Now that we had the two first rows done, we continued that pattern until we had completed the entire space. Remember to always leave a 1/4″ space between all obstructions.
Here I am placing the last Subfloor panel of our future office/craft room:
Ready to see the entire space with DRIcore Subfloor?


FABULOUS right?! I LOVE IT!
Looks like a room already, doesn’t it?!
Want to know how long it took us to install the DRIcore Subfloor? Took us less than 2 hours and that includes the time it took us (Sébastien and my Dad) to figure out a trap system for the municipal drain.
If you like to read up more on DRIcore Subfloor, I recommend you check out my fellow DRIcorespondents blog posts on installation: Storefront Life, Suburble, A Pretty Life, and One Heart, One Family. Oh, and DRIcore also asked us to share with you The Best DRIcore Tips, which you’ll see is packed with a bunch of great tips!
Want to know more about DRIcore Products and get tips on basement renovations?
Make sure to check out their website: DRIcore Products
DRIcore Products is also on Facebook and Twitter.
Follow along: #DRIcorespondents
Have a fabulous day!

Disclosure: I’m a very happy DRIcorespondent. A big THANK YOU to DRIcore Products for supplying me with their products. As always, all opinions in this post are 100% my own.


Well done! I don’t suppose you’re available for housecalls? We have a basement ceiling that needs some serious TLC :-)
And this is what I love about you… you make installing subfloors look sooooo easy. Thanks for the step by step. I’ll have to add this to my How to… Pinterest Board.
It looks like a lot of hard work, but it looks nice!
It looks great! We are about 3/4 of the way with our same DriCore project. My husband is buying the foam underlayment tonight, as we are hoping that this 3-day weekend will allow us to finish up the DriCore installation and start with real flooring. Great tutorial! Good luck with your project.
I have been hearing nothing but good things about DriCore, and the fact that Brian stands behind it makes it even more reputable for me ;) haha.
I have been recommending it to a few of my friends who are looking to develop their basement.
Congrats on being one step closer to your office/craft room! This looks really interesting. I remember some of these steps from when my husband helped finish the basement in our last home.
It’s looking so great Christine! Can’t wait to see how it all comes together!
Want to come over and help with my bedroom and living room makeovers LOL! Looks great so far and can’t wait to see it all done!
I would love to finish our basement, but hubby won’t give up his workshop :(