How to Plank a Wall with Wood Paneling
Want to learn how to plank a wall? Planking a wall is a great way to give a wall a completely new look. We planked a closet wall and just love how it turned out, now we want to plank more walls.

We have been hard at work giving our daughter’s bedroom a makeover.
We started off by painting the bedroom in a fresh new colour. We changed the closet doors and her bedroom door. Then we started working on her closet.
A few weeks ago I shared with you how we built shelving for her closet. We built them in order to remove her dresser from her bedroom, to give her more space.

By sharing the tutorial, you saw how her closet was transformed by planking the walls. Now it’s time for me to explain how we did it.

As you can see from the before photo, the closet walls were covered with drawings. For some reason my daughter and her friends thought it would be fun to draw on the walls. It started off with one drawing, then it just kept going to the point I didn’t bother telling her no.
Prepping wall before installing paneling
Before we actually started planking the walls, we had a few things to do.
This post also contains some affiliate links for your convenience. Click here to read my full disclosure policy.
We started off by applying BIN 2 on the shelves where there were drawings. We also applied BIN 2 on the other areas in the closet where there were drawings and that we weren’t covering with planks.

We proceeded to paint the shelving in white and the whole upper part of the closet, since we were not planking that area.

Sure, we could have painted the entire closet, but we figured it was a waste of time since we were installing wood paneling.
We made sure the walls were free of nails. It’s important for the surface to be flat.
How to plank a wall with wood paneling
Supplies:
- Paneling (We used 8′ v-joint rustic grade paneling made of eastern white wood.)
- Glue – Paneling adhesive
Tools:
Instructions:
Step 1: Prior to installation, we removed the packaging from the paneling. We placed them inside the closet and stored them there for 72 hours prior to installation. We did this to acclimate the wood.


Step 2: We started off by placing the first piece of wood paneling at the bottom of the wall with the groove pointing to the floor (tongue pointing up) making sure the pretty side is pointing out. We did this to make sure it fit properly, this method is called dry-fit.
Note: The closet wall is 8’ wide, which means we did not need to cut any of the paneling for that wall.

Step 3: We then turned the paneling face down and applied glue to the back of the paneling.
Note: We used glue and nails to attach the paneling to the walls. Depending on the surface, nails can be used on their own as well. And same for glue, it can used on its own.

Step 4: We put the paneling back against the wall placing a level on the top to make sure it was level. It’s important to make sure the first piece is level. Then we pressed it firmly into place.


Step 5: Using our nailer, to secure the paneling even more to the wall, we nailed each end of the paneling as well as the middle.

Step 6: Time to add the second piece. We dry fitted the next piece making sure it attached correctly to the previous piece.

Step 7: We removed the second piece and applied glue to the back.

Step 8: We inserted the second piece into the first piece by inserting the groove into the tongue of the previous piece. Then we pressed it firmly against the wall.


Step 9: Just like in Step 5, we nailed it to the wall.

Step 10: We continued following the above steps until we had planked the wall up to where the shelves were.


Step 11: We also planked the sides of the closet leaving space to add a thick piece of wood. The piece of wood served as the support for the shelves and to attach the closet rod.
Note: Unlike the main wall we did have to cut the paneling for the side walls. To do so, we used our miter saw.


Step 12: To fill the corner gaps between the back planked wall and the planked sides, we added corner moulding.

Closet with wood paneling


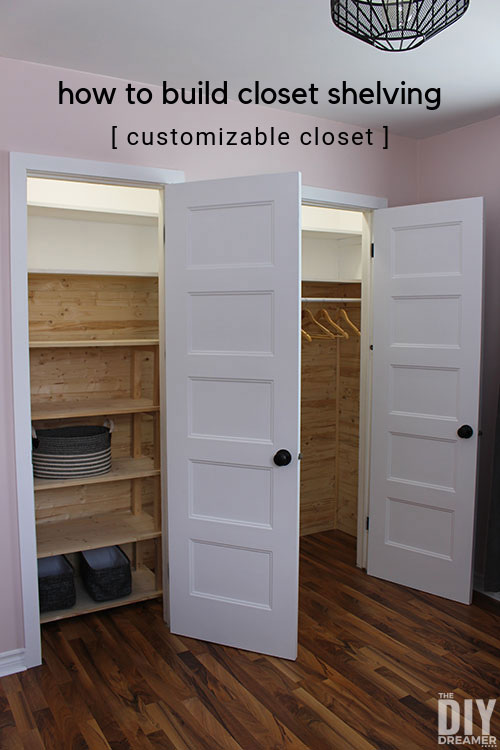
Doesn’t the closet have an entirely new look with the planked walls? We just LOVE how it turned out!
Not only does it look great it didn’t cost very much either. By using rustic grade it only cost us $40 in paneling.
How to install wood paneling

As you can see, it really isn’t complicated to install wood paneling. Just a question of measuring, cut the pieces, fastening them to the wall, and then move on to the next pieces.
It does take a couple of hours to install though, but the results make it worth it.
Hope you enjoyed this DIY tutorial on how to plank a wall.
Have a fabulous day!
Christine

How to Plank a Wall with Wood Paneling
Learn how to plank a wall with this tutorial explaining how to install wood paneling.
Materials
- Wood paneling (8ft v-joint rustic grade paneling made of eastern white wood)
- Paneling adhesive
Instructions
- Before starting installation, remove paneling from packaging. Acclimate the wood paneling in the location it will be installed for a minimum of 72 hours.

- Dry fit the first piece of wood paneling on the wall, with the groove pointing down and the tongue pointing up. If the piece is too long, cut it to size.

- Apply adhesive behind the wood panel.

- Place the wood panel back on the wall and place a level on it to make sure the panel is level.

- Press the panel firmly against the wall.

- Use a nail gun to secure the panel on the wall on each end of the panel and in the middle.

- Dry fit the second piece of paneling by placing the groove inside the tongue of the first panel. If it fits correctly, remove it and follow the next step. If it does not fit correctly, put the piece aside and use another panel.

- Apply adhesive behind the panel and insert it into the previous panel.

- Press the panel firmly against the wall for it to adhere to the wall.

- Use a nail gun to secure the panel on the wall.

- Repeat Step 7 to 10 until the entire wall is paneled.

- Trim moulding can be added to give the plank wall a finished look.

- The plank wall can be varnished, stained, or painted.

Notes
Depending on the type of surface that is being covered with wood paneling, glue can be used on its own and the same thing for nails. Read the packaging on the wood paneling, it will tell you which method is recommended for each type of surface.
Recommended Products
As an Amazon Associate and member of other affiliate programs, I earn from qualifying purchases.


