Painting Preparation: Back Porch
Back in May I shared with you how my 1960’s home needs an outdoor makeover. The list of things we have to do was quite long, we were hoping to get most of it done this year (minus getting new windows, we need to budget those in). We had such a crappy summer this year, it rained a lot. It’s hard to work outdoor when it’s raining, especially when you want to paint. But we did get to work on our back porch when it wasn’t raining, which took a little longer than we thought it would.
This is what our back porch looked like before we started working on it:
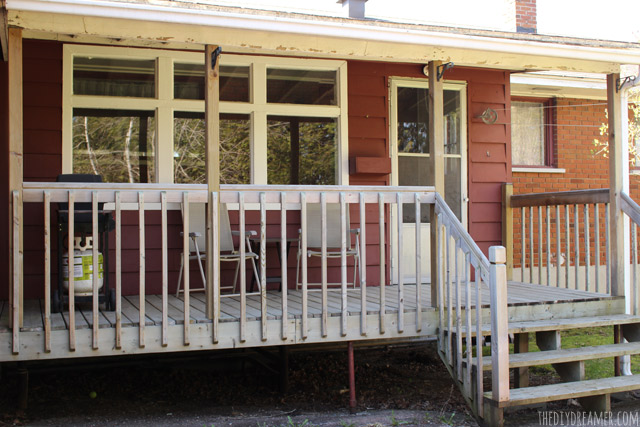
Here’s a recap of what we wanted to do:
Outdoor back porch:
- The entire porch needs to be painted (siding, steps, flooring, railing and posts!).
- We want to replace the old storm door with a new door.
- Make a screen door.
- The light fixture needs to be changed. We may even move it next to the big window and perhaps had a second light on the other side of the window.
Painting Preparation: Back Porch
The first thing we did was tackle the porch’s ceiling. Oh what a job that was!! Whoever installed the roof over the porch didn’t use the proper nail length. Hundreds of nails stuck out of the ceiling, I’d say about 20-30 nails in each row. Which meant, scraping the paint from the ceiling would take forever (trying to get around the nails) and we’d have no choice but use a paint brush (impossible to use a roller with nails sticking out). So, Sébastien took out a grinder and spent so many days (maybe weeks?) grinding down each and every nail. What a trooper he was, I would have given up after 5 minutes.
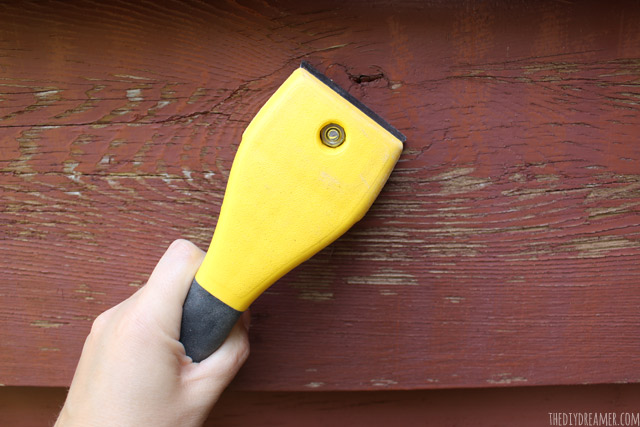
Once all the nails were grinded down, it was time to remove the old paint. The old paint was thick, uneven, flaking off…. so we decided to sand it down back to the original wood. This process took a while too.. working on a ceiling is not easy work.. especially for your neck and your arms. Lucky for me Sébastien did all the work (I guess I owe him big time!).

However, I did do some work while he was doing all the hard stuff, my job was to scrape the walls.
Once we were all done removing sanding and scraping, it was time to change our old storm door. We removed the old door and framing. While we were removing everything, Sébastien removed the light above the door. He had to make a new piece of siding to go over where the light was (the light left a huge hole in the wall). He even made the door frame! His very first door frame too! He did a great job! :) P.S. LOVE my new door! Don’t you?

Now that we were done all the prep work (we also filled in holes we found in the wall), it was time to clean everything! I used my Dad’s pressure washer to clean everything up. (Side note: I will be putting a pressure washer on my Christmas Wish List.)

The porch is all clean and dust free! It’s ready for some paint!! YAY!!

We’ll be painting the ceiling, railing, window frame, door frame, and posts in BEHR MARQUEE Exterior Satin Enamel – Stone Walkway. The walls will be painted in BEHR MARQUEE Exterior Satin Enamel – Unpredictable Hue. We’ll be using DECKOVER Boot Hill Grey for the flooring and steps. It’s going to look FABULOUS!

Getting ready to start painting! The FUN part!

Eek, can’t wait to finish painting the back porch and share the reveal with you!
UPDATE: My Back Porch has a Fresh New Look.
Have a fabulous day!

P.S. I’ll be linking to these Parties.
Disclosure: A big THANK YOU to BEHR for supplying me with paint to complete this back porch makeover. As always, all opinions in this post are 100% my own.


Looks great!! Can’t wait to see what the finished result looks like once it’s painted :) Beautiful job!!
Good luck! Can’t wait to see how it all turns out. We have a gigantic deck/balcony area that was left untreated by the previous owners. It’s going to be such a big job… perhaps we will add a pressure washer to our Christmas list too ;)