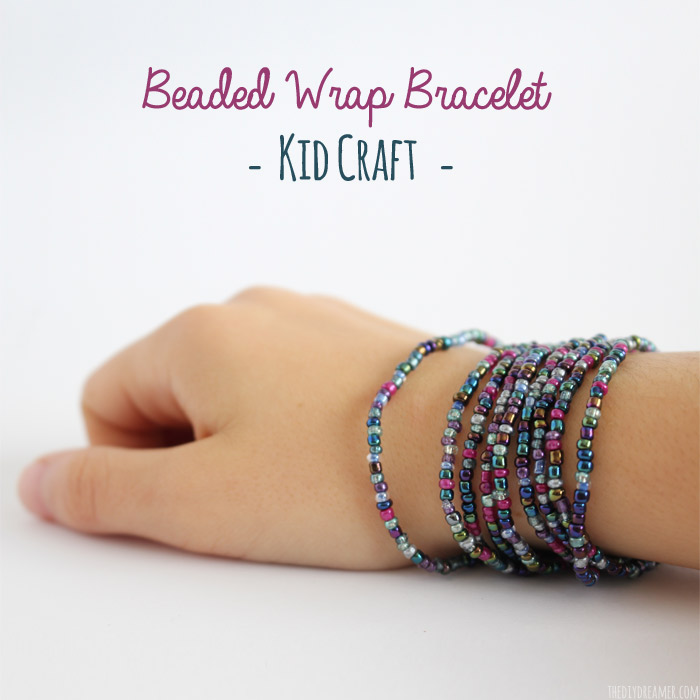
Beaded Wrap Bracelet Tutorial – Kid Craft
Learn how to make a beaded wrap bracelet.

With the Holidays fast approaching, it’s time to start thinking about gifts. And that’s exactly what Gabrielle has been doing!
This year she wants to make gifts for family members. She decided she should start making things now if she wants to be able to make something for everyone. (Smart thinking!)
The first gift she worked on was a beaded wrap bracelet.
She asked if I could share a tutorial with you in case you would like to make some too. (Of course she didn’t have to ask me twice! hehe)
She likes making jewelry and sharing tutorials like the silk wrap bracelets she made.
This post contains some affiliate links for your convenience. Click here to read my full disclosure policy.
Beaded Wrap Bracelet – Kid Craft
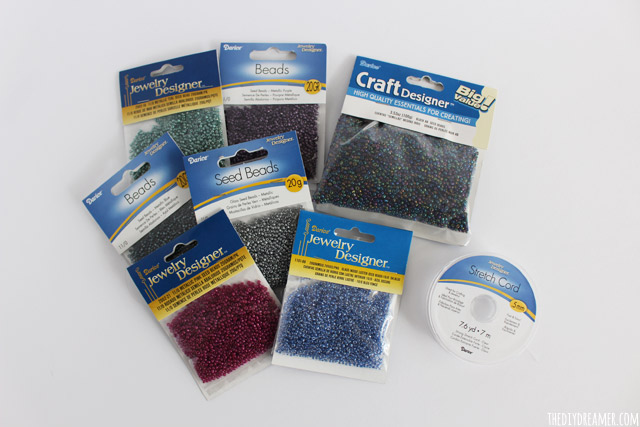
Supplies:
- Glass Seed Beads
- Stretch Cord (Gabrielle used Jewelry Designer Stretch Cord by Darice size .5mm)
- Bowl
- Scissors
Instructions:
Step 1: Gabrielle started off by opening all the packages of beads she had chosen at the store and poured them in a bowl.
She used her hands to mix all the beads. (Aren’t the colors fabulous?! It’s beaded goodness in a bowl!)

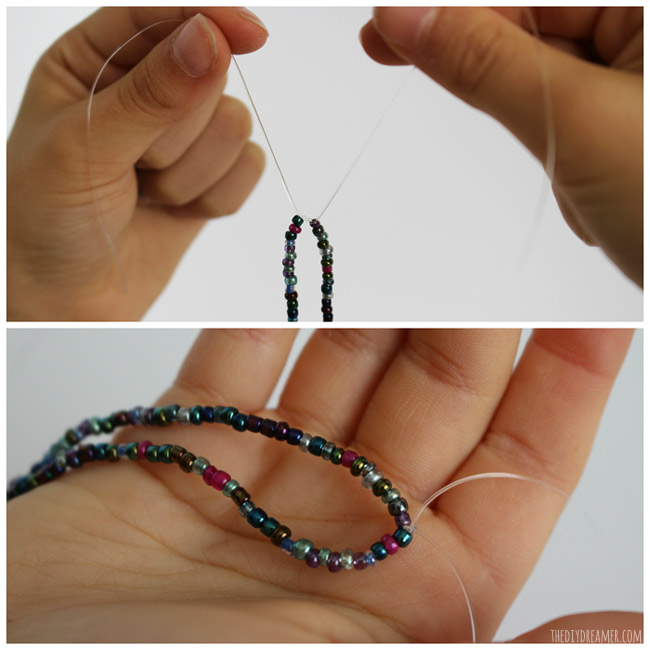
Step 2: She unraveled a little bit of the stretch cord and started threading beads.
She did not cut the stretch cord because she finds it easier to thread that way.
If she needs more cord, she just has to slide the beads back and pull on the cord. No worries about the beads slipping off the other end.
PLUS, it makes it super easy to put aside until you are ready to work on it again. I found the idea quite genius!
She stopped threading the beads once the length hit 50″.

Step 3: Once she had threaded 50″ of beads, she cut the stretch cord that was still attached to the packaging. And then she took both ends and made a double knot.
How to make a knot slip-proof
If the knot isn’t strong enough, try making one or two surgeon’s knots.
You can also add a small bead of jewelry glue on the knot.
I found this video on how to make the knot slip-proof gave a wonderful visual on how to do it.
Step 4: She cut the extra stretch cord and voilà, she was finished!
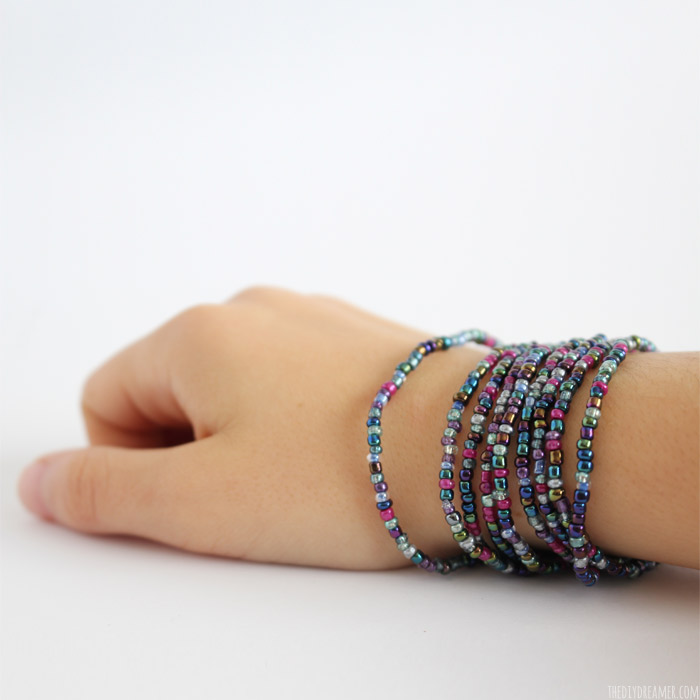

The beaded wrap bracelet is quite fabulous, right?!
I think it turned out so beautiful, I LOVE the colors she picked too! They look so pretty together.
P.S. If you liked Gabrielle’s bracelet, please feel free to PIN and/or Share with your friends. :)
Hope you enjoyed this tutorial! Have a BEAUTIFUL day!


That is insanely clever! You are doing a good job raising a new crafter! Pat yourself on the back for that. Then pat your daughter on the back for giving an old lady a new craft to do with the great niece!
Thats genius! My daughter can make these for all my nieces! Im broke so thank you very much!! I have some hemp string and it is just to heavy but this would be perfect!
Gabrielle did a wonderful job. I like her tip about keeping the cord on the package so they don’t fall off the end.
This is such a pretty bracelet! I love the colors your girl chose! So creative…just like her momma. Thanks for sharing at my Creative Ways Link Party!
Blessings,
Nici
What a cute and easy craft. I know my kids will love it.
This is an adorable and simple craft for children! Thank you for sharing this. :)
-Lara
Nice craft for kids, allthough the beads are really tiny!
ohh love the bling!! Appreciate your sharing the tute on how to make my own Beaded Wrap Bracelet!
This is fabulous! Thanks for sharing!
Sherry
So cute! We will have to try this over Thanksgiving when we have all the little ones together. So happy you shared it at our Found & Foraged linky party! Hope to see you next week.
My nieces would love this project. Thanks for the idea!
Great idea to do with my girl – Thank you!
such a cute one- I’m so glad you shared it at the Found & Foraged party! hope to see you back this weekend. have a good week!
How nostalgic see this was for me! My sister and I used to make beaded bracelets when we were kids! These are so cute!
*seeing
Can’t wait to make these! Thanks for linkin up to Sunday FUNday! I’ll be featuring you at this weekend’s party! Hope to have you link up again! XO
I made some like that years ago that I still wear now. Cute and easy, and I love bracelets!
Congratulations! This post is going to be featured over at Diana Rambles tomorrow and has been pinned in the Featured at Diana Rambles board at Pinterest and Tweeted. Please grab a featured button off my button page or via the post guidelines graphic. Thanks for sharing this awesome idea!
Can I ask you some advice please? On the one I did in Kenya they told me to thread the needle with some string that you tie to the elastic for your bracelet. I’m having trouble with the right kind of knot as the beads won’t go over the knot I’ve made. Isn’t there a special sort of knot I should use?
Hi Poppy! Hope you are well!
To avoid the beads from slipping while making the bracelet, my daughter kept the string on the string reel. She cut the string off the reel when she was finished then she made a knot with both ends.
Perhaps a loop knot? Maybe that would be big enough to prevent the beads from slipping?
Or another option, if you want to make a knot on one end while threading beads, maybe you can tape down the knot on a surface, that will stop the beads from slipping over the knot. Or you can even wrap it to a bigger object (like a popsicle stick) then make a knot and start threading. Once you are finished, unwrap the string from the object, attach both ends, and cut the extra string you had wrapped around the object.
I hope this helps!
Is the final product a long necklace looking piece that you need to wrap and loop on wrist? Or is there a way to put glue on ends and have a toggle clasp after wrapping?Thanks!
Gorgeous colour combo! Thanks for sharing! My only question is this? How do you keep your stretchy crystalline from undoing itself? Even with a double knot, mine aren’t very secure. Thanks x
Thank you! I’m happy you like it! If it keeps undoing itself, try making one or two surgeon’s knots instead. You can also add a small dot of jewelry glue on the knot. I hope this helps!
Love the colors of these bracelets! My girls would love making them, pinned!
Is a surgeon’s knot the same as a lock knot? That’s what I use. AND a drop of clear nail polish helps keep them from coming untied. As I age and the arthritis worsens. I love stretchy bracelets and necklaces so that I don’t have to deal with clasps! I love the colors, too!