
DIY Planter Boxes for Herbs – How to make a planter box
Learn how to build planter boxes for herbs.
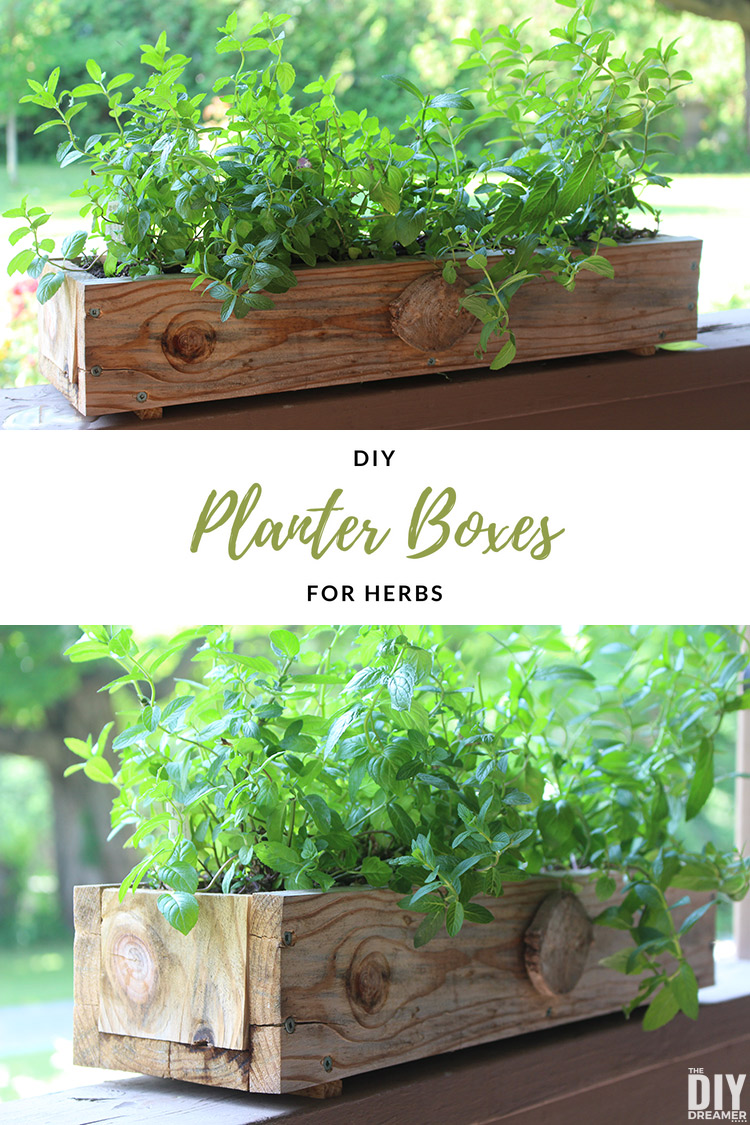
Having herbs on hand is always practical.
Herbs can be used to enhance flavors of your favorite recipes. They are also great as home remedies. They also smell so good!
Why not build planter boxes to grow some for yourself?
My parents built herb planter boxes last year.
Gabrielle fell in love them immediately and has been asking to have her own. She has been wanting to plant herbs for a while.
Last weekend she asked her grandfather if he would show her how to build a planter box for herbs, just like he had built already. He gladly said yes and they started working on the project.
This post also contains some affiliate links for your convenience. Click here to read my full disclosure policy.
DIY Planter Boxes for Herbs
Supplies:
- Wood (We used cedar scraps.)
- Drill bit (We used a 15/16″ drill bit, but it can be any size.)
- Decking screws 1½″ (Any wood screw would work, we just used what we had on hand.)
- Wood slices 2x
- Wood glue
- Geotextile
Please note: For a more polished look, glue and nails would be the better option. We wanted to complete our herb planter boxes fast and we didn’t mind the look with screws. If you prefer not using screws, just omit them and use glue and nails instead.
Maybe we should have attempted to make them nail-less, screw-less, and glue-less. hehe
Tools:
- Planer
- Table Saw
- Radial saw
- Drill
- Drill press
- Nail gun
- Staple gun
- Retracting knife
Instructions:
To complete this project, we needed the following pieces of wood:
- 3 pieces of wood 24″ long by 4″ wide
- 2 pieces of wood 4″ long by 3″ wide
- 2 pieces of wood 5.5″ long by ¾″ wide
Step 1: We used a planer to make the scrap pieces of wood uniform thickness.

Step 2: We proceeded with the table saw to make the edges of the wood straight and the width uniform.

Step 3: Using a radial saw, we cut 3 pieces of wood to 24″ length.

Step 4: Next step was to attach the 3 pieces of wood together to make the front, bottom, and back of the planter.
Using the drill we drilled 3 screws on the bottom edge of 1 board into another board (makes an L shape).
Once the 2 boards (front and bottom) were attached we repeated the same process in order to attach last board (to make back side).

Step 5: Time to work on the interior sides.
To determine what size we needed, we placed a piece of wood in the opening and drew a cut line with a pencil.
We then moved back over to the radial saw to cut 2 pieces of wood 4″ long by 3″ wide.


Step 6: Using the drill we attached the interior sides to the box with 3 screws.
We drilled screws on the sides and on the bottom.
We proceeded by doing the same process on the other side.

Step 7: We used a drill press to drill 3 holes at the bottom of our planter box. These holes act as the drainage system for the planter box.

Step 8: We wanted to add feet to the planter box.
In order to do so we turned over the box and measured the length needed which was 5.5″.
We cut two pieces of 5.5″ with the radial saw.
We glued the pieces with wood glue about 1.5″ away from the edges of the bottom of the box.
Using a nail gun, we then tacked them into place.

Step 9: To add a cute look to the planter boxes, we added wood slices.
We glued wood slices approximately centered on each side of the planter box.
Using a nail gun we tacked them into place.

Step 10: To finish the project, we inserted geotextile into the box.
We lined the box with geotextile and stapled it into place with a stapler.
We cut off the extra with an retracting knife.

Step 11: Time to plant the herbs!


DIY Planter box treatment
Our DIY planter boxes are not treated with anything, as they are made of cedar and we plan to put herbs in them (keeping the herbs away from chemicals).
Of course you can treat yours if you wish, just ask the paint department of your local hardware store what they recommend based on the wood you used and the usage of your planter boxes.
DIY Planter box for herbs or for flowers
The planters we built can be used for flowers too.
If making them for flowers, it may be best to make them a little bigger in order for them to have a little more place.
I would probably make them 4¾″ high instead of 4″. As long as you make sure your 3 pieces are the same size and you modify the small sides, everything will work out perfectly.
If you do plant flowers and you cut the flowers to bring them inside, this DIY paint stick flower basket is a great way to display them.
I hope we have inspired you to create something!
Have yourself a FABULOUS day!

P.S. I’ll be linking to these Parties.
You may also enjoy these DIY projects:


Great project and your sweet young helper makes it look easy. Great idea to add the drain holes. So glad you shared this post on link party. Happy Summer, Kippi
I love the rustic wood you used!
Such a beautiful post! I’d luv to invite you to join us and share over at Charming Homes & Gardens Link Party. We’d luv to have you??♀️ https://www.dabblinganddecorating.com/single-post/2020/03/31/Charming-Homes-Gardens-Wednesday-Link-Party