
Shutter Headboard Tutorial
Shutter Headboard Tutorial ~ Last year I started searching for the perfect headboard for Emanuelle’s bedroom.
After doing a lot of research (searching on the web and looking through magazines), we decided that a shutter headboard would be perfect.
Lucky for me, my parents came across a set of shutters at an antique store that they visit regularly. They were perfect to work with, they weren’t damaged at all.
I started to work on them right away.
This is how they looked when I was finished:

Isn’t the headboard gorgeous?
I really love how it turned out. Even though it took me a year to share it with you, one of those projects that got completed, but I hadn’t had a chance to blog about it. OUPS!
This post contains some affiliate links for your convenience. Click here to read my full disclosure policy.
Shutter Headboard Tutorial
Supplies:
Wood Shutters (Remove all the hardware on the shutters if they are still attached.)
Paint Remover
Metal paint scraper
Palm sander aka Orbital Sander
Wood filler
Plastic spatula
Sand paper
Primer Paint
Paint Brush
Heavy-duty frame hooks
Instructions:
Step 1: Use paint remover and a spatula to remove the old paint from the shutters. Follow the instructions indicated on the product.
Step 2: Once you have removed as much paint as possible, use a sander to sand the shutters until they are nice and smooth.

Step 3: Use wood filler to fill in any holes you wish to fix with the help of a plastic spatula. I kept a few holes to give the headboard a rustic look.
Step 4: When the wood filler has dried, use sand paper to smooth it out.

Step 5: Apply at least two coats of paint with a primer in it. I actually applied 3 coats, as you can see 2 coats didn’t cover the green enough.

Use heavy-duty frame hooks to attach the shutters to the wall.
And voilà, you have yourself a shutter headboard.

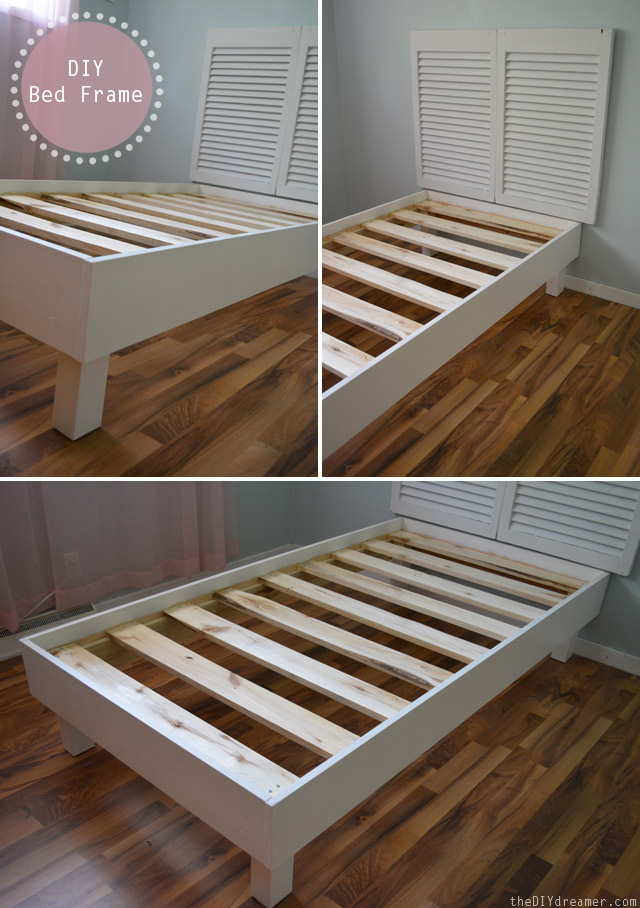
We also made the bed frame.
I’ll share how we made the bed frame in a future blog post.

As you can see we didn’t end up putting pink bedding on her bed. We picked up a white duvet cover at Ikea instead.
Now we need to get cracking on her furniture.
We’ll be working on them this summer and hopefully I won’t wait a year before sharing it with you.
Do you like how the headboard turned out?
Have a GREAT day!!

P.S. I’ll be linking to these Parties.


Love your shutter headboard! I recently made one for our master bed. It was a bit of work (cleaning those slates is a bit tedious) but totally worth the finished product! I really like the shutters you found for this project. Just perfect for the bed.
Oh wow! This is so cute. Great job!
This is adorable! I’d love to try it in a nice natural wood finish for my boys!
What a fantastic idea. I have been trying to come up with an idea for a new headboard in OUR bedroom!! I should keep an eye on your blog and maybe you have more ideas!!
Have fun!
Patricia, Sugar & Spice & All Things ? Nice
wow I can’t believe they started out all grungy like that!
that is absolutely beautiful! I love it when people take both things make new again! It’s great for the environment and helps get rid of waste
Très bonne idée Christine!!! J’aime bien ça!
Natalie
XX
That is amazing. What a transformation, it’s super cute. :)
This is such a cute clean look! I would love if you would share this at my linking party http://www.fidlersunderoneroof.com/2013/06/fidlin-fridays.html
I love old shutters like these Christine! I just got ahold of some old shutter style closet doors (free from my mom’s friend) and I love thinking of all the possibilities for them… This headboard idea is adorable!
Thanks for sharing how you refinished the shutters! I have some old ones and wasn’t sure what to do with them. Think I’ll give it a try!
SO amazing job! love shutter headboards but this is truly the prettiest I have ever seen. Such a lucky princess you have :-) Hope you’re enjoying the summer dear Christine, big hug Mette and thanks for the tutorial!
Super cute! Love this! Thanks so much for sharing.
Hope you have a good week!
Hugs from Portugal,
Ana Love Craft
http://www.lovecraft2012.blogspot.com
Very Pretty!!!
I love shutter ( or door ) headboards – beautifully done!
XOX
Such a cute headboard! I love shutters! I’m new to blogging and found you at the sundae scoop! Your blog is so fun, I’ll be following you!
Therena
Love this! One the look out for small shutters now :)
Yes, I love how you turned these shutters into a headboard; very nice! :-) I’ve been looking for shutters for a while but no luck, I’ve also been looking for an old wooden ladder, no luck either! love that they can be transformed into beautiful things & wow, you guys also did the bed frame, can’t wait to see how! :-)
Hope you are having a great evening Christine!
so cute!
I love this project Christine! Thank you so much for sharing your project at the Pretty Things party :)
xo, Tanya
Hi , I love CRAFT ,that is very cute.thank you for your sharing ;)
How cute is this headboard! I love it! Thank you for sharing at our Pinteresting Party!
Super adorable!! I love how simple, yet makes a big statement!
By the way, I’m giving away a copy of Handmade Walls E-book on my blog right now if you or your followers are interested in entering to win! It has tons of ideas on how to create custom art and frames for your walls. Love it!
http://www.theturquoisehome.com/2013/06/yay-for-500-likes-on-facebook-handmade.html
I just Loooooove this Christine!!! wonderful job, it makes a lovely space!
Hope you are having a lovely day
Hugs
Cami @ TitiCrafty by Camila
Sunday Bewitch Me & Titi {Link Party}
Thursday Titi’s Spot for the Pin HOP
Such a cute idea!
Super cute!! I found you at the Inspiration Exchange party. Hope you have a fabulous evening!
Danielle
SewMuchCrafting.com
We love this project! Simple little bed with that darling headboard.
So glad you linked up with us at the BeBetsy BRAG ABOUT IT Link and Hop.
Have a great week~
Sharon and Denise!
wow, this looks fantastic! what a great idea to use shutters like that
This is simply adorable, I can see me doing this project in my little girls room. Roechelle @ http://www.hugatreewithme.com
Gosh this is just ADORABLE!! You have done a wonderful job. Thanks for the time in creating the tutorial.
Following from the Ginger Snap Crafts linky party.
OMG how adorable – I hope I can find some shutters around town! Hopping over from Raegun Ramblings. Pinning to my home decor board right now! Lauren from the Little Bitty Kitchen http://littlebittykitchen.blogspot.com/
I can’t pass up a shutter for just such projects as yours. What a great headboard! Have you seen on pinterest the pin where they used shutters for a whole wall? It was amazing.
This looks awesome!!!
I haven’t seen shutters as the headboard before. It is adorable! Good job!
Sherry
You have been featured at Craftionary for your awesome idea.. :) Come and check it out and button up if you like!
It looks fantastic Christine :)
Love it! Cute and simple! Thanks for partying with us at Give Me The Goods Monday! Hope to see you back next week! Jenna @ Rain on a Tin Roof
what a wonderful idea!
Looks fabulous Christine! Every time i go to the Habitat ReStore I debate buying shutters! :)
Thanks so much for linking up to support habitat. Good luck and hope to see you back next week!
This is so cute and I LOVE the name of your little girl. We just named our newest baby, Brenna Evangeline.—another one of those beautiful E names for girls! :) Thanks so much for linking up to Make Bake Create. I’ve got a Homemaking Party going now, if you’d like to link up there as well. http://www.hopeineveryseason.com/2013/06/pretty-pinks-and-greens-for-homemaking.html
Blessings!
Mrs. Sarah Coller
What a cute and fun idea for kids’ rooms! We would love for you to share at our first Super Summer Saturday party here: http://www.thechirpingmoms.com/2013/06/super-summer-saturday-party.html!
Thanks!
Julie
Wow Christine! The headboard turned out so beautifully! Pinned this one!
Wow, this turned out so sweet. I love how simple and clean it looks!
I would be honored if you share this at my link party, Ginger Jamboree!
Thanks so much for linking up to Your Whims Wednesday, I featured this on my blog tonight! Come stop by and grab a featured button: http://www.mygirlishwhims.com/2013/06/your-whims-wednesday-117-and-features.html
What a super creative headboard!! I LOVE it! Thanks so much for sharing at Thursday’s Temptation. I am going to be featuring it at tonights link party!
Jill
I see you already saw your feature… ;) but just wanted to say thanks for sharing with us at Fancy This Fridays!
http://www.trulylovelyblog.net/2013/06/fancy-this-fridays-133-and-features/
~Kassi @ Truly Lovely
Christine, Great headboard! Looks perfect for her room. What a great find at the antique store. I’ve pinned it.
Adorable headboard. Thanks so much for sharing with Adorned From Above’s Blog Hop. The party will be back this week starting Tuesday and 8:00PM mountain time. We can’t wait to see what you have to share this week.
Have a great week.
Debi and Charly
Hi, I’m interested in the bed you made with the shutter headboard. I want to make my own bed but need directions and list of materials,lol.Can you Please contact me on my e-mail with your post about making the bed? I’d really enjoy hearing from you,I liked the shutter post and you’re great at explaining the process.Thanks! Candy
What a darling project
I loved your Tip Me Tuesday link . {thanks girl!}
Where can I find ‘How to build the bed frame’ post? I haven’t had any luck finding it and I love the simplicity of this frame. Just what I’ve been looking to build for my son’s room. Thanks!