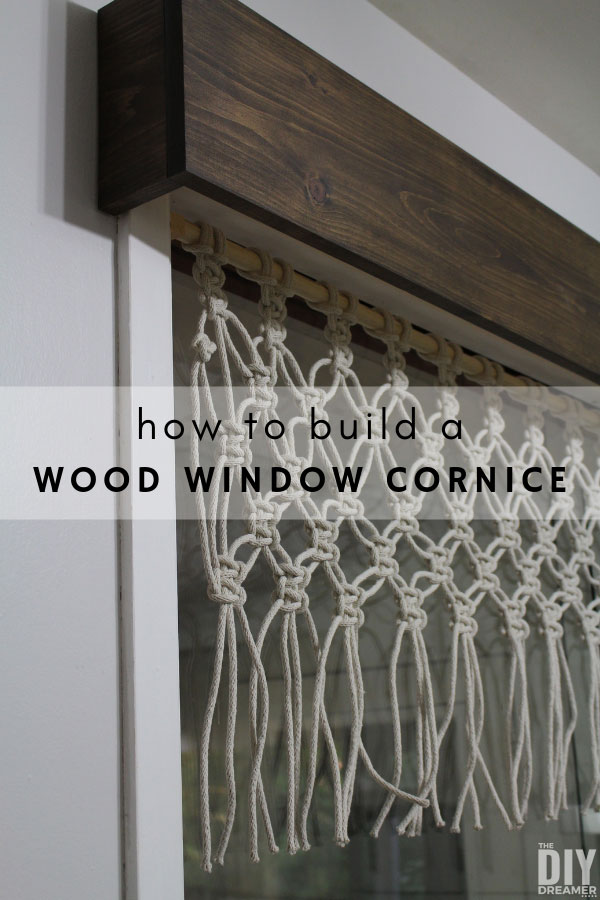
How to Build a Wood Window Cornice
A wood window cornice is easy to build and takes less than two hours to put together. It’s a great way to hide window hardware and to give a fresh new look to an old window.

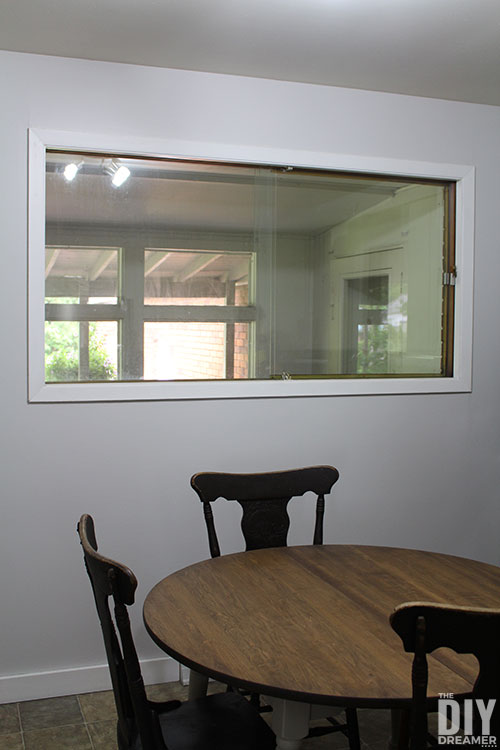
We have a big window in our kitchen that we have always found difficult to put window treatments.
Since the window is so close to the stove, we can not put long curtains.
At one point, we had put a lace valance. The lace valance just didn’t fit with us, so we eventually took it down and never replaced it with anything.
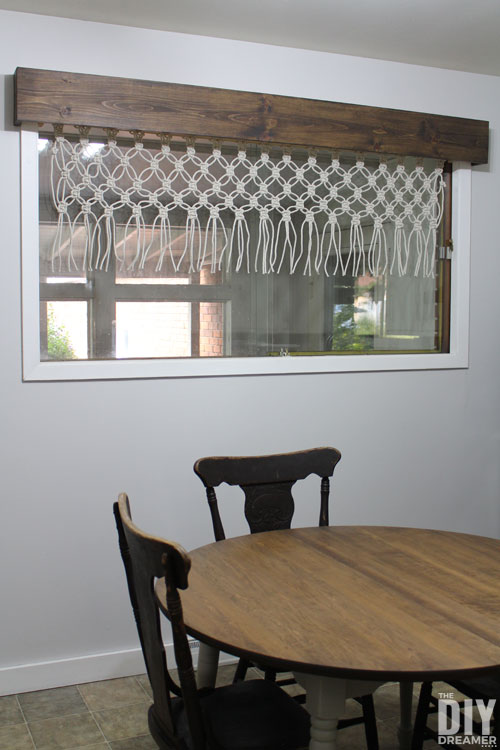
DIY Wood Window Cornice built under 2 hours
Our window treatment solution for our window was a DIY wood window cornice.
A wood cornice would add a nice fresh look to our old window.
It’s also the perfect project for this month’s At Home DIY Challenge: 2-Hour DIY Challenge
I’m participating in a year long DIY challenge with fabulous DIY bloggers. Every month we have a new challenge. Last month’s challenge was Build It Cheaper Than Buying It Furniture, my project was how to build a nightstand (which also took less than 2 hours to build!) At the bottom of this post you’ll find a bunch of 2-Hour DIY projects.
Thank you to Fusion Mineral Paint for providing us with stain for this project. We are extremely grateful for their support.
This post also contains some affiliate links for your convenience. Click here to read my full disclosure policy.
How to build a wood window cornice
Supplies:
- Wood board (We used one 1×8 at 8 feet long.)
- Screws
- Stain or paint
- Drywall plugs
Tools:
- Tape measure
- Square
- Miter saw
- Kreg jig
- Router
- Keyhole bit (optional)
- Drill press (optional)
- Clamps
- Level
- Hammer
Instructions
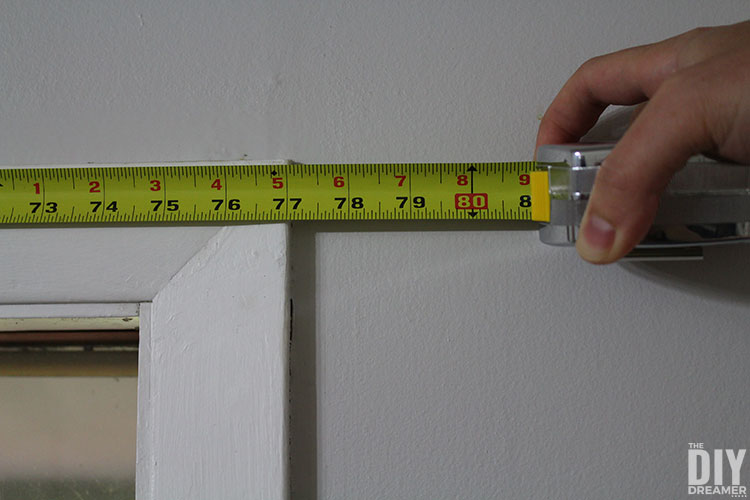
Step 1: We started off by measuring our window and its frame.
They measure 77 inches. We added 2 inches (to have a little extra overhang), which gave us 79 inches in total.
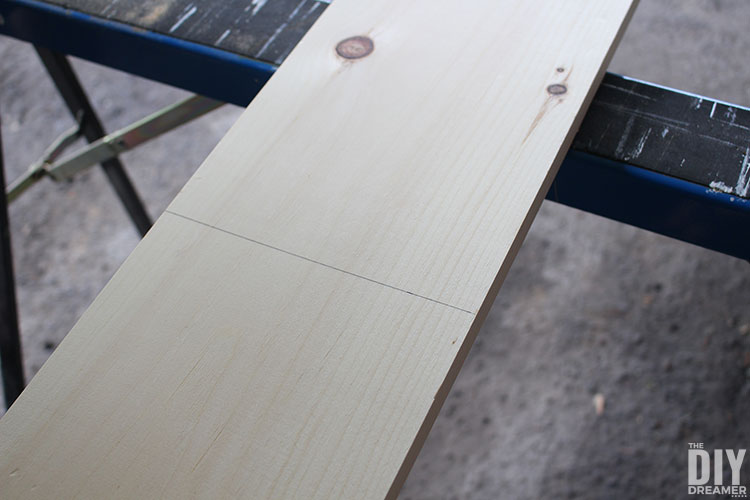
Step 2: We made straight lines on the board, where we wanted to make the cuts, using a square.
It’s important to measure and cut one piece at a time. Measure, cut, measure next piece, cut, etc…


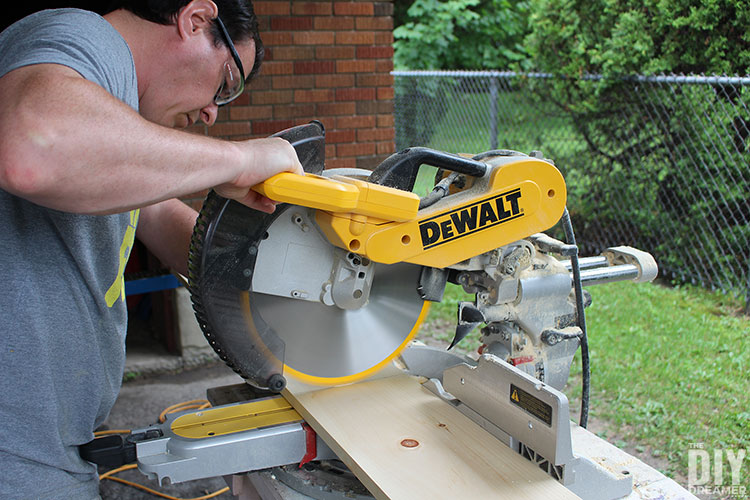
Step 3: Using a miter saw, we cut three pieces of wood from the 1×8.
We cut one piece 79 inches long and 2 pieces 3 inches long. The 3 inches pieces are the side pieces.
Please note: We wanted our wood cornice to be tight around our window and frame because we have no intention of putting curtains. However, if you want to put curtains, the main board and sides need to be longer in order to have enough space for the curtain rod and curtains to clear and to tuck away on the sides.


Step 4: We brought in the 3 pieces of wood and dry fitted it around the top of the window.
I quite enjoyed watching my hubby and daughter balance the entire thing. hehe

Step 5: Time to use the Kreg Jig!
We added 2 pocket holes on the inside of the 2 small pieces of wood.


Step 6: We lightly sanded the wood with 120 grit sandpaper and stained.
We used Fusion Mineral Paint’s Stain & Finishing Oil All in One in the color cappuccino.
To stain we followed the same process as we did when we stained our tabletop minus wetting the surface, it’s a soft wood so no need to bring up the grain.
We did not stain the back of the main piece, nor the back edge of the small pieces.
Once stained, we had to wait until the next day to continue working on the project so that the stain had time to dry.


How to assemble a window cornice
Step 7: In order to hang the wood window cornice, we added 2 keyhole slots in the back of the two small pieces.
We made a little T on the top part of the pieces of wood in order to remember where the top was.
We put a little dot where we wanted to start the keyhole slot.
We put the keyhole bit in the router table. We made a dent on the wood, where the dot was, with the keyhole bit.
We moved to the drill press and drilled a pocket where the dent was.
We could have skipped this step and only use the keyhole bit, but we figured by doing it this way we will extend the life of the keyhole bit.
We went back to the router table and inserted the hole inside the bit and made a keyhole slot.
We repeated until both pieces had 2 keyhole slots, making sure the keyhole slots were positioned in the same location on both pieces.

FYI in case you are not familiar with a keyhole slot. The big hole is where you insert the screw head and the long part is where you slide the screw head to prevent the screw head from slipping out of the keyhole.
Please note: Instead of keyhole slots, you could also put D Ring Hangers. However we opted for keyhole slots because we wanted the window cornice to be as tight as possible to the wall. Or you can use a Kreg Jig to make slots like we did for our wood wall sconces.
Step 8: We assembled the cornice by placing the small pieces of wood on each side of the back side of the long board with the pockets pointing inwards.
We used clamps to keep them secured in place.
We drilled screws inside each pocket hole.


How to install a wood window cornice
Step 9: We measured where to install it, making sure to mark where the screws would go.
It’s important that the screws line up with the keyhole slots.
We also used a level to make sure it was straight by positioning it on top of the wood window cornice where it was going to be installed.
Tip: Measure and re-measure to make sure everything lines up perfectly.
The screws go at the top part of the keyhole slot, the opposite end of the big part of the keyhole slot.


Step 10: Using a drill, we drilled where the screws would go.
We inserted drywall plugs into the holes and hammered them in.

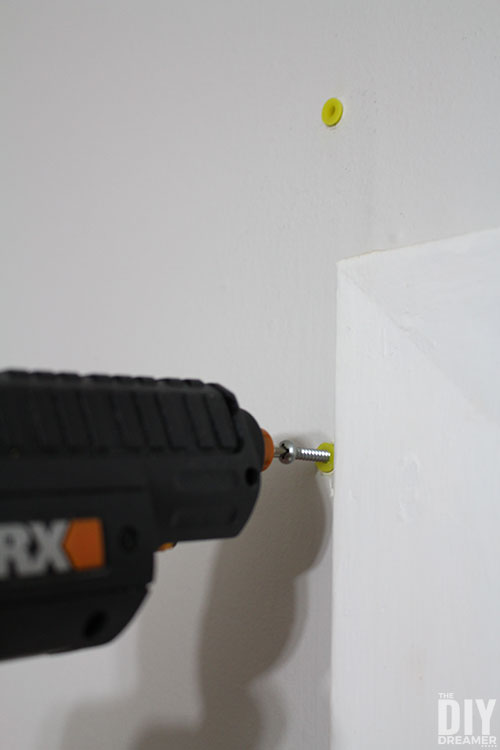
Step 11: We drilled screws inside the drywall plugs.
We made sure to leave them partly out so they would slip into the keyhole slots.

Step 12: Time to hang the window cornice!
Insert the screws into the keyhole slots and slide the wood window cornice down until it’s locked into place.

Voilà! Finished!

Doesn’t it look great?! I just ADORE IT! I love that it took less than 2 hours to build!
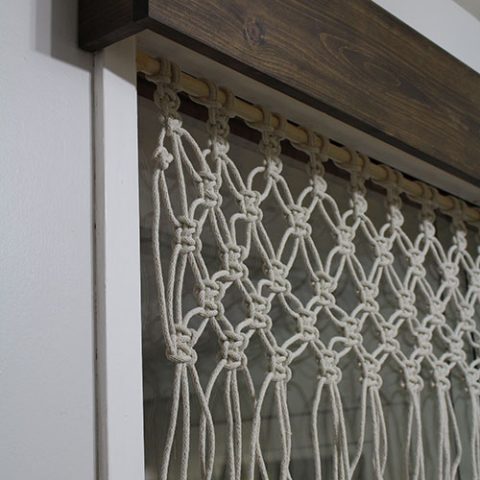
DIY Window Macrame Valance
As we worked on the wooden window cornice, our 10 year old daughter was working on her own project, a macrame valance!
She followed a macrame kitchen curtain tutorial. The tutorial is really worth checking out! It really helped make our window beautiful.
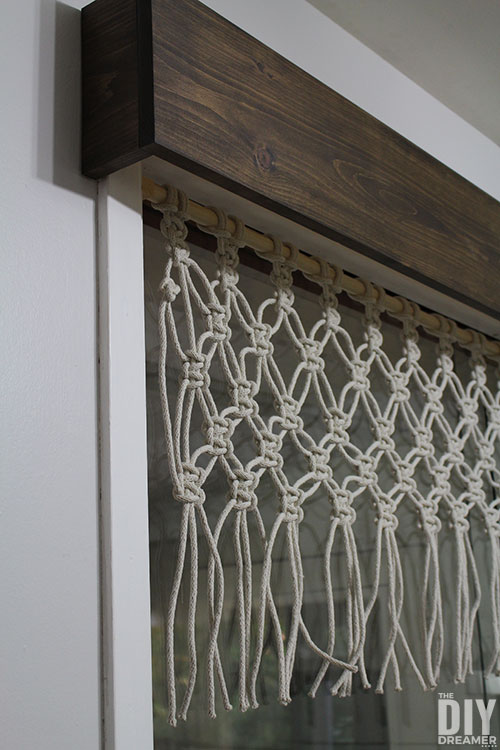
My husband made wood blocks and screwed them into the window frame.
We then placed a 6 foot ¾’’ wood dowel.
We bought 4 packages of 100 feet 100% cotton rope (for a total of 400 feet) and let Emanuelle get to work.
Just to give you a reference point based on the calculations suggested by Little Vintage Cottage. Our window is 6 feet wide and 35.5 inches high, Ema used 34x 8 feet lengths of rope to complete the project.


Isn’t she amazing? I did not help her at all, she did it all on her own!
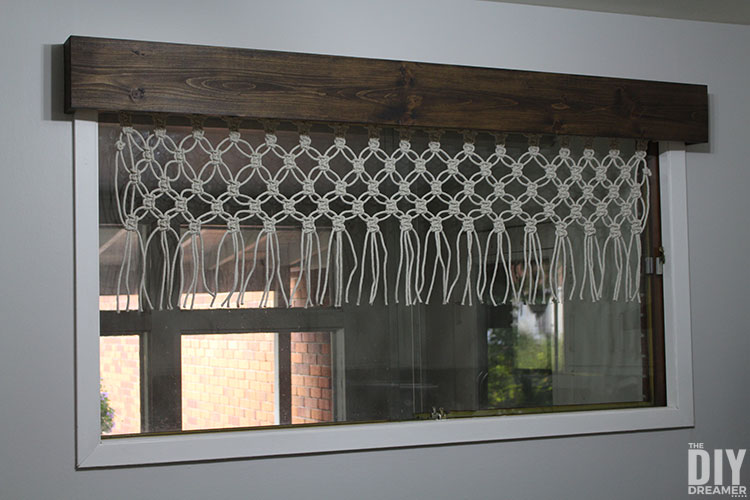
The macrame valance turned out PERFECT! It looks so good on it’s own and paired with the wood window cornice we made.
We may add a hook in the middle of the window frame to give the wood dowel a little more support. It’s a little droopy in the middle from the weight of the macrame valance.
Both the cornice and valance turned out so beautiful that I want us to do the same thing with the window above the sink. Emanuelle agreed to do another macrame valance for me, YAY!
UPDATE: Emanuelle made another macrame valance for the window above the sink! You can see it in my updated kitchen makeover where I share how to paint tile backsplash.
With the left over cotton rope I have made rope bowls! They are so fun to make!
Emanuelle made a super cute yarn wall hanging to hang in the kitchen too!
DIY Wood Window Cornice
I really hope you like the wood window cornice we built and that you love the macrame valance my daughter made.
We had so much fun putting it all together.
Have a GREAT day!

How to build a Wood Window Cornice
Learn how to build a wood window cornice under 2 hours. A great way to update a window with DIY window treatments.
Materials
- Wood board
- Screws
- Stain
- Drywall plugs
Tools
- Tape measure
- Square
- Miter Saw
- Kreg Jig
- Router
- Keyhole bit (optional)
- Drill press (optional)
- Clamps
- Level
- Hammer
Instructions
- Measure length of window and frame.

- Mark the board where you would like to cut it. 1 piece the length of the window and frame plus 2 inches. (If the window and frame measure 77 inches cut the board 79 inches.) Plus 2 pieces 3 inches wide.
- Cut board into three pieces using a miter saw.
- Dry fit the pieces around the window and frame.

- Add 2 pocket holes on the inside of the 2 small pieces of wood.
- Lightly sand wood with 120 grit sandpaper and stain the pieces.
- Once dry, add 2 keyhole pockets in the back edge of the two small pieces using a keyhole bit.

- Assemble wood window cornice by attaching the two small pieces of wood on each side of the long board with screws inside the pocket holes.

- Measure carefully where to install it.
- Drill holes in the wall and insert drywall plugs.

- Insert screws inside drywall plugs.

- Hang wood window cornice.
Notes
Dimensions are custom. Measure your window and frame to calculate the correct size for the window cornice. If you intend on adding curtains, please keep that in mind when determining size of the window cornice. Calculate enough space for the curtains and curtain rod to clear.
Recommended Products
As an Amazon Associate and member of other affiliate programs, I earn from qualifying purchases.


Love it! Great idea!
Nice upgrade! Looks so pretty on your window, too. :)
I love the way this looks! And the dark wood stain looks great!
Wow, Christine! What a great tutorial and fabulous new look. I love seeing what new projects you have going on in your home. This one is a favorite, for sure.
I love the macrame’, too.
Pinned for reference.
Lovely! I need to do this in our bedroom soon. We need something pretty and new for our house. :)
that macrame valance is SO COOL!!
Wow, this really is beautiful. Your daughter did a fabulous job on the macrame and it looks like she is going to be creative like you!
Keyholes?! What a great idea and thanks for that tutorial because I’d have to use L brackets. And you daughter is so cute, she did a great job!
Beautiful! Love how this valance turned out and your daughter did an amazing job on the macramé!
It looks so much better, what a transformation! I love the macrame window dressing too, so modern :-)
Your cornice is lovely and I am equally impressed with your daughter’s macrame skills! Thanks for sharing at Vintage Charm!
I love this! The cornice is beautiful, and your daughter did a fantastic job on the macrame! I am featuring this post today at Thursday Favorite Things!
Congrats on your feature at TFT! I’m wanting to add a cornice box or two to My Wee Abode, as well, so definitely wanting to pin this (I don’t see a pin button activated for your pin, though… so I scheduled it.) We would love you to join us at Tuesday Turn About via myweeabode.com! Hope to see you there!
Awesome! Your daughter did amazing on the macrame!
Great tutorial and the finished product looks fantastic! Thank you for sharing at Party In Your PJ’s.
Your cornice looks great and I love the macrame valance! Pinning. Visiting from Creative Muster.
Love it! And your daughter is so talented! Thanks for sharing at Vintage Charm. xo Kathleen