SMARTWALL Installation in our Basement Office – Craft Room
We did it! We installed DRIcore SMARTWALL in our basement office and craft room.
If you follow me on Instagram you probably saw the little sneak peek I shared the day we installed it. We’ve been ready to install the DRIcore SMARTWALL ever since we finished installing the DRIcore Subfloor back in January. However, since we play in outdoor broomball tournaments all winter, we waited until our tournaments were finished.
Why? Well, because we assumed we needed at least a full weekend to install it in our office.
Guess what?! We shouldn’t have waited. Why?
Because we could have done it in one day! Seriously!!
We installed the framing in a few hours one morning and then we installed the SMARTWALL in 2 hours the following morning! NO JOKE!!!
Pretty cool right? We went from concrete walls to finished walls in less than 5 hours! And I’m certain the next room we’ll tackle will be even quicker.
DRIcore SMARTWALL Installation
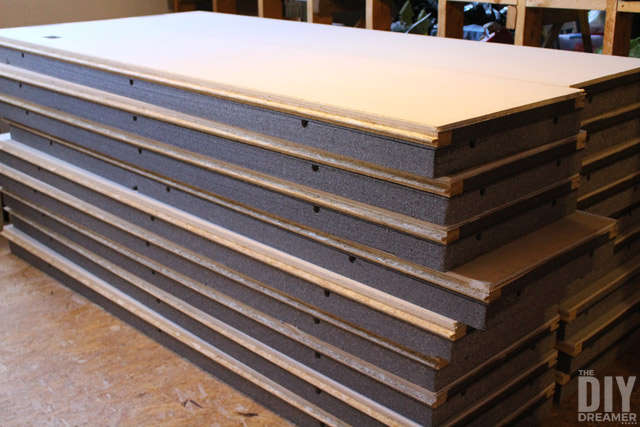
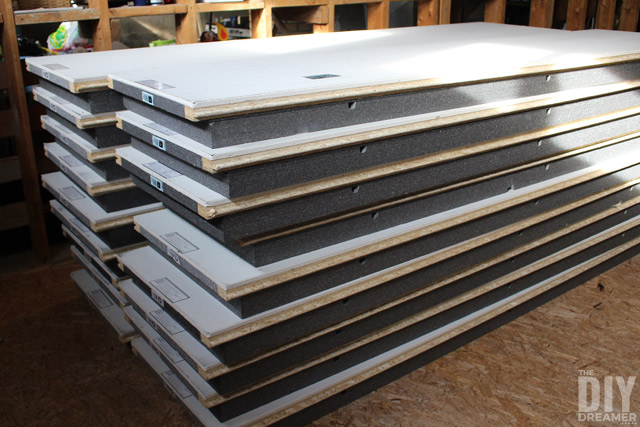
DRIcore SMARTWALL is the easiest and smartest way to finish your basement walls. The all-in-one engineered wall panel requires fewer steps, less time and less labour to finish your basement. Why? Because each panel includes: Framing, Insulation, Vapour Barrier, Drywall, and Electrical integrated wiring channels! And there’s No Taping Required, Minimal Sanding Required, and Panels are Pre-Primed! Get the job done 5x faster using DRIcore SMARTWALL.
Here’s Bryan Baeumler talking about the benefits of DRIcore SMARTWALL.
Before we started the installation, we watched the below video. It’s a very useful video that demonstrates the installation of both DRIcore Subfloor and DRIcore SMARTWALL.
Supplies and Tools needed for installation
– DRIcore SMARTWALL (Use the Project Calculator to determine how many panels you need.)
– 2″ x 2″ lumber
– Pencil
– 2 1/2″ and 5″ screws
– PL Premium Glue
– Electrical wire (contact your Electrician for more information)
– Drill
– 2 saw horses
– Chalk line and plumb line
– Level
– Retract knife
– Large carpenter’s square
– Jigsaw and/or hand saw
– Tape measure
* Safety is always important. Safety shoes, safety glasses, work gloves, and dust mask should be worn.
* Make sure to cut panels in a well ventilated area.
Instructions:
Detailed Instructions by DRIcore
Step 1: We started off by marking a straight line on the floor. I had forgotten to buy chalk for our chalk box in order to make our chalk line, so we used a 2″ x 2″ lumber as our guide and drew a straight line with a pencil.

Step 2: Using our straight line as a guide, we stood a 2″ x 2″ lumber up and used a level to make a straight line on the floor joists. Of course, if you have a plumb bob, use that instead! We made a line on every second joist. We then used a drill and 2 1/2″ screws to fasten 2″ x 2″ lumber along our straight line. This is to create our top track.

It’s important to make sure that the ends of 2″ x 2″ lumber are fastened into a floor joists. If you see your 2″ x 2″ will hang over a little, cut it down.

Step 3: Next, it was time to install our floor track. Using the straight line we had drawn on the Subfloor, we made 2 5/8″ marks from the front of our line. We then fastened 2″ x 2″ lumber with 2 1/2″ screws into the Subfloor. Make sure to leave a 1/2″ space at each bottom corner.

Here’s a look at our top and floor tracks:
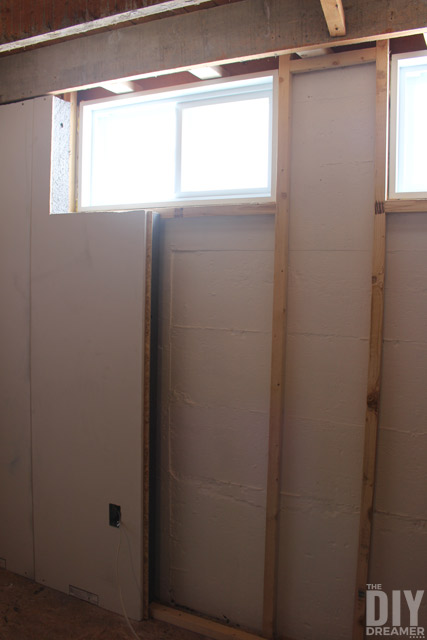
Step 4: We have two basement windows in this space. The windows are close to the ceiling and wide, so we needed to partially frame the wall in order to be able to install the SMARTWALL, otherwise we had nothing to fasten the SMARTWALL to.

Step 5: The fun part, putting up the SMARTWALL! YAY! We measured the height where the first panel was going to be installed. We placed our SMARTWALL panel on two saw horses and used a large carpenter’s square and pencil to mark where we had to cut. Then we used a retract knife to score the paper of the SMARTWALL. (We did this to make sure we didn’t tear the paper while we cut the panel). We used a hand saw to cut the SMARTWALL. Always cut the top of the panel, never the bottom!
The SMARTWALL is very easy to cut with a hand saw and it’s quite fast too. We did also find that using a jigsaw to cut the wood part of the SMARTWALL on both edges prior to using the hand saw, did make the process even quicker!

Step 6: Once the panel was cut, we placed in its place. We made sure it was nice and straight before attaching it to the tracking system. We used 5″ screws to secure the top of the panel and 2 1/2″ screws for the bottom. We only applied one screw at the top and one screw at the bottom, until we placed the second panel.


Step 7: Using Step 6, we continued the rest of the wall. The panels have a tongue and groove system, so the panels slide into each other. Once we placed our next panel, we would add the second screws to the previous panel, and the first screws to the current panel. We found by doing this it allowed us to slide the panels into each other easier (it gave us wiggle room).

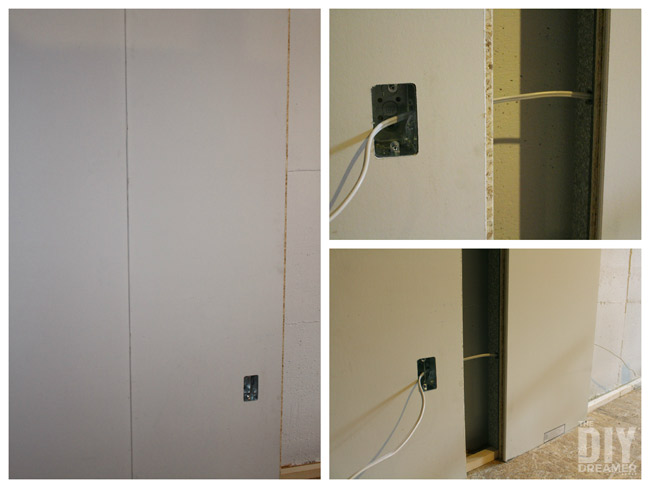
Step 8: DRIcore SMARTWALL comes with 2 vertical and 3 horizontal wiring channels that allow for easy installation of electrical wiring. You can feed the wires through the horizontal channels as you install the panels or after all SMARTWALL panels are installed by using a wire fish. Ask your electrician first!
Step 9: Once we got to our inside corner, we cut the tongue side of the last panel. We applied a bead of PL Premium Glue and attached the panel of the next section of wall we were starting.

Step 10: We continued the same process on the last wall, however we used a jigsaw to cut panels in order to fit around the basement windows.


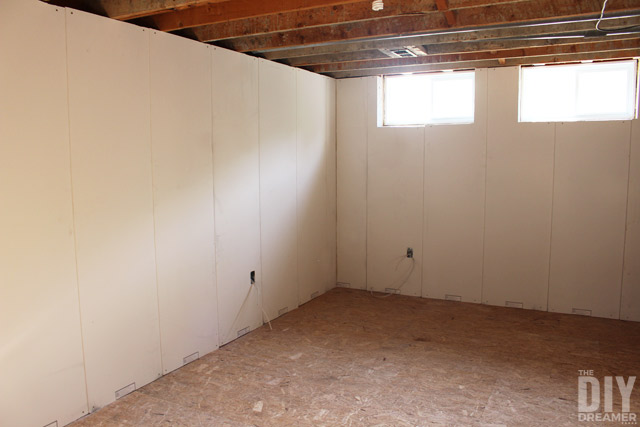
Here’s our basement office / craft room with all the SMARTWALL installed:


Doesn’t it look GREAT?! I still can’t get over how quick it was!! Seriously! It took us no more than 5 hours, and I’m sure the next room we tackle will be even quicker!
Before we apply the SMARTWALL Patch Pro to seam the micro bevels of the DRIcore SMARTWALL, we will finish our interior walls. Which means, next up… framing the duct work, and old school drywall installation! I’ll be able to compare how quick the SMARTWALL Patch Pro compared to the basic tape and mud!
If you like to read up more on DRIcore SMARTWALL, I recommend you check out my fellow DRIcorespondents blog posts on installation:
Storefront Life, Suburble, and A Pretty Life.
Want to know more about DRIcore Products and get tips on basement renovations?
Make sure to check out their website: DRIcore Products
DRIcore Products is also on Facebook and Twitter.
Follow along: #DRIcorespondents
P.S. Remember how I was uncertain what do to with the ceiling? I have found the PERFECT solution, but I’ll share that with you another time. I’m keeping you in suspense! haha
Have a fabulous day!

Disclosure: I’m a very happy DRIcorespondent. A big THANK YOU to DRIcore Products for supplying me with their products. As always, all opinions in this post are 100% my own.


Love how easy it is to saw!
Finished walls in less than 5 hours? Wow, this is really great! I will check out DRIcore.
I keep hearing how awesome DriCore is! I am hoping to buy a newer home soon so I can develop the basement to suit my family and my needs, I’ll use DriCore for sure as it saves a step or two ;)
This looks cool! My mom just finished a room in her basement and it took her a LONG time to do the drywall. I wish I could’ve told her about this! I’ll have to send it to her to think about when she finishes the rest of the basement. :) Thanks for sharing!
Wow this is great. Looks so much easier to install than other types. I’ve heard great things about Dricore.
That’s awesome! It went up so fast, and you make it look so easy. Can’t wait to see the finished project. Ricki